Convert XML product data to JSON and check arrays and types
Convert sample product data from XML to JSON in your browser and inspect attributes, element text and repeated elements. Screenshots also show how numbers and single-item arrays change after a JSON–XML round trip.
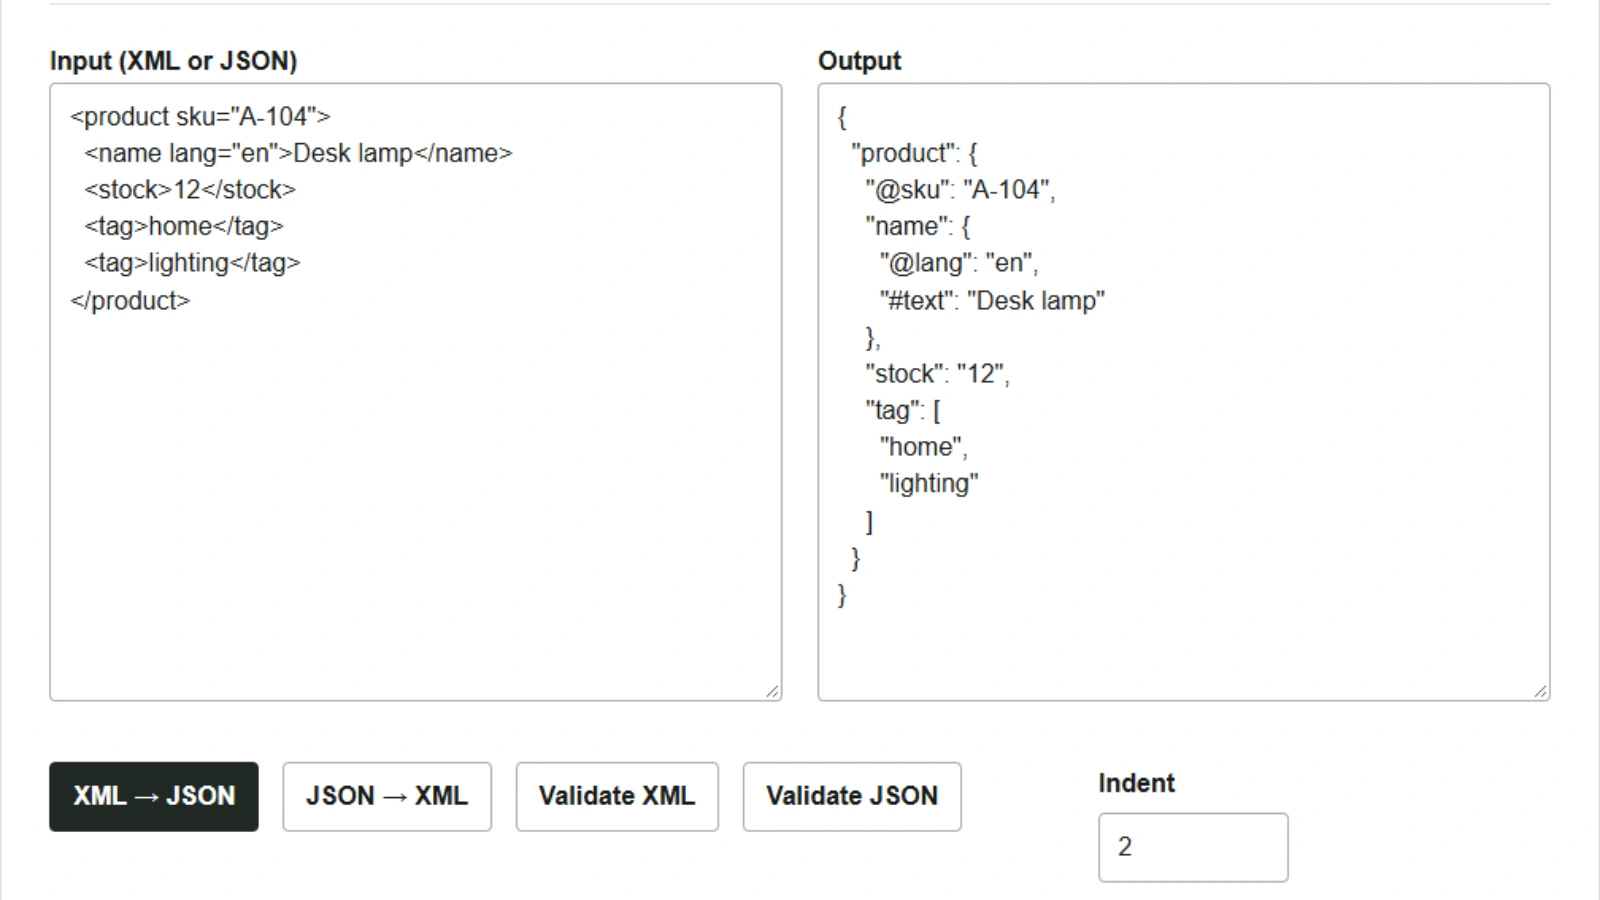
Before passing product data received as XML to a process that reads JSON, check which values become strings and which become arrays. If a product with one tag has a different structure from one with two tags, the receiving code needs to handle both. Try the XML ⇄ JSON converter with some sample product data.
Inspect XML attributes and tags in JSON
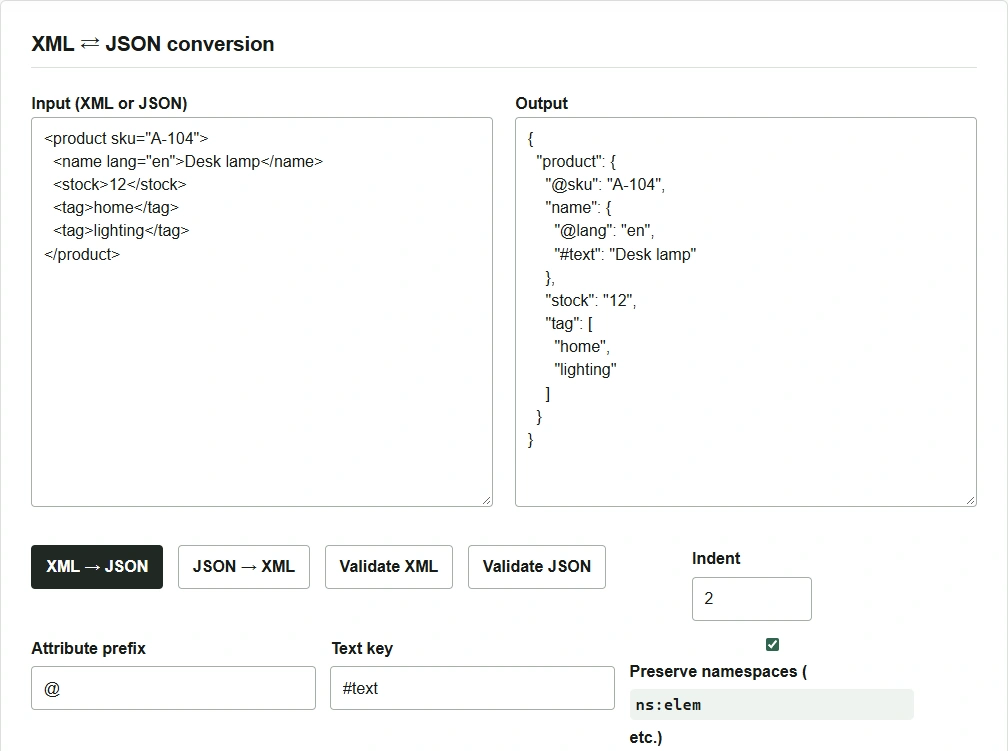
- Paste the following XML into Input (XML or JSON).
- Leave the attribute prefix as
@and the text key as#text, then click XML → JSON. - Inspect
productin Output. To save the result, click Copy, paste it into a text editor and save it asproduct.json.
<product sku="A-104">
  <name lang="en">Desk lamp</name>
  <stock>12</stock>
  <tag>home</tag>
  <tag>lighting</tag>
</product>
The product-code attribute sku becomes "@sku": "A-104". Because the product-name element also has an attribute, the language appears as "@lang": "en" and the name as "#text": "Desk lamp", both under name. The two tag elements become ["home", "lighting"]. The stock value is the quoted string "12".
Convert JSON to XML and back to JSON
Start with JSON that already contains a number and an array to see where the structure changes during conversion. Paste the following JSON into the input field.
{
  "product": {
    "@sku": "A-104",
    "stock": 12,
    "tag": ["home"]
  }
}
- Click JSON → XML. The output on the right includes
<stock>12</stock>and<tag>home</tag>. - Click Copy and replace the contents of the input field on the left with the copied XML.
- Click XML → JSON. Check that
stockhas become"12"andtaghas become"home"on the right.
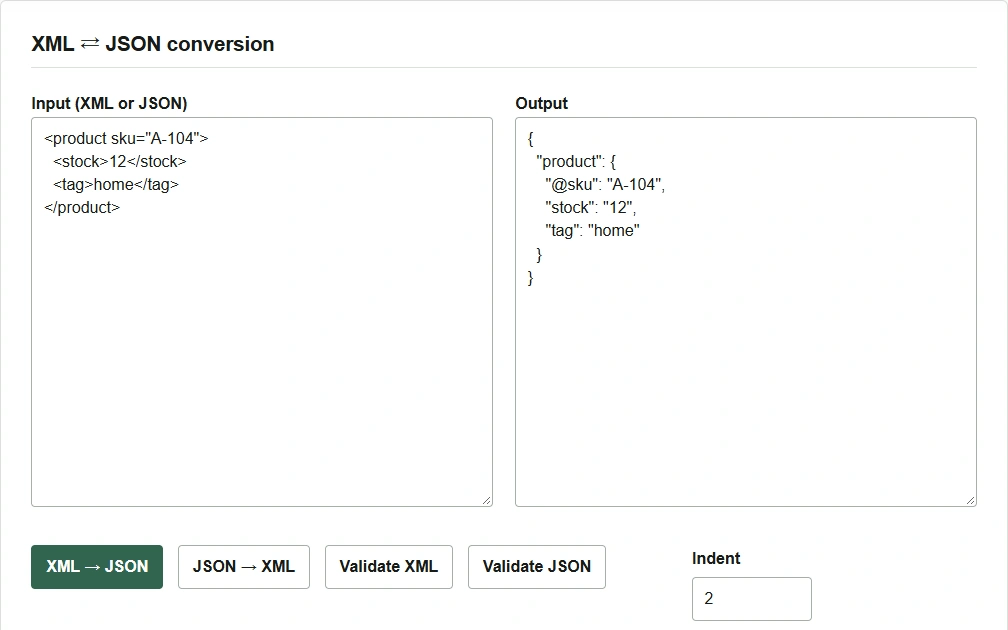
The tool reads XML element text as strings. It also creates an array when two or more child elements share a name. If the receiving system expects stock to be a number and tag always to be an array, check each field’s type before saving the output and adjust it to the receiver’s requirements if necessary.
To check for syntax errors, place the data to examine on the left and click Validate XML or Validate JSON. These operations check the input’s syntax. Check field types and item counts by comparing the JSON output on the right with the receiving system’s specification.