Royal Blood II: The Dinarl Kingdom Chronicles walkthrough and save editing
A guide to the PC edition of Royal Blood II, covering recruitment in both campaigns, loot and puzzles in 29 dungeons, facility combinations, opening administration, and save editing.
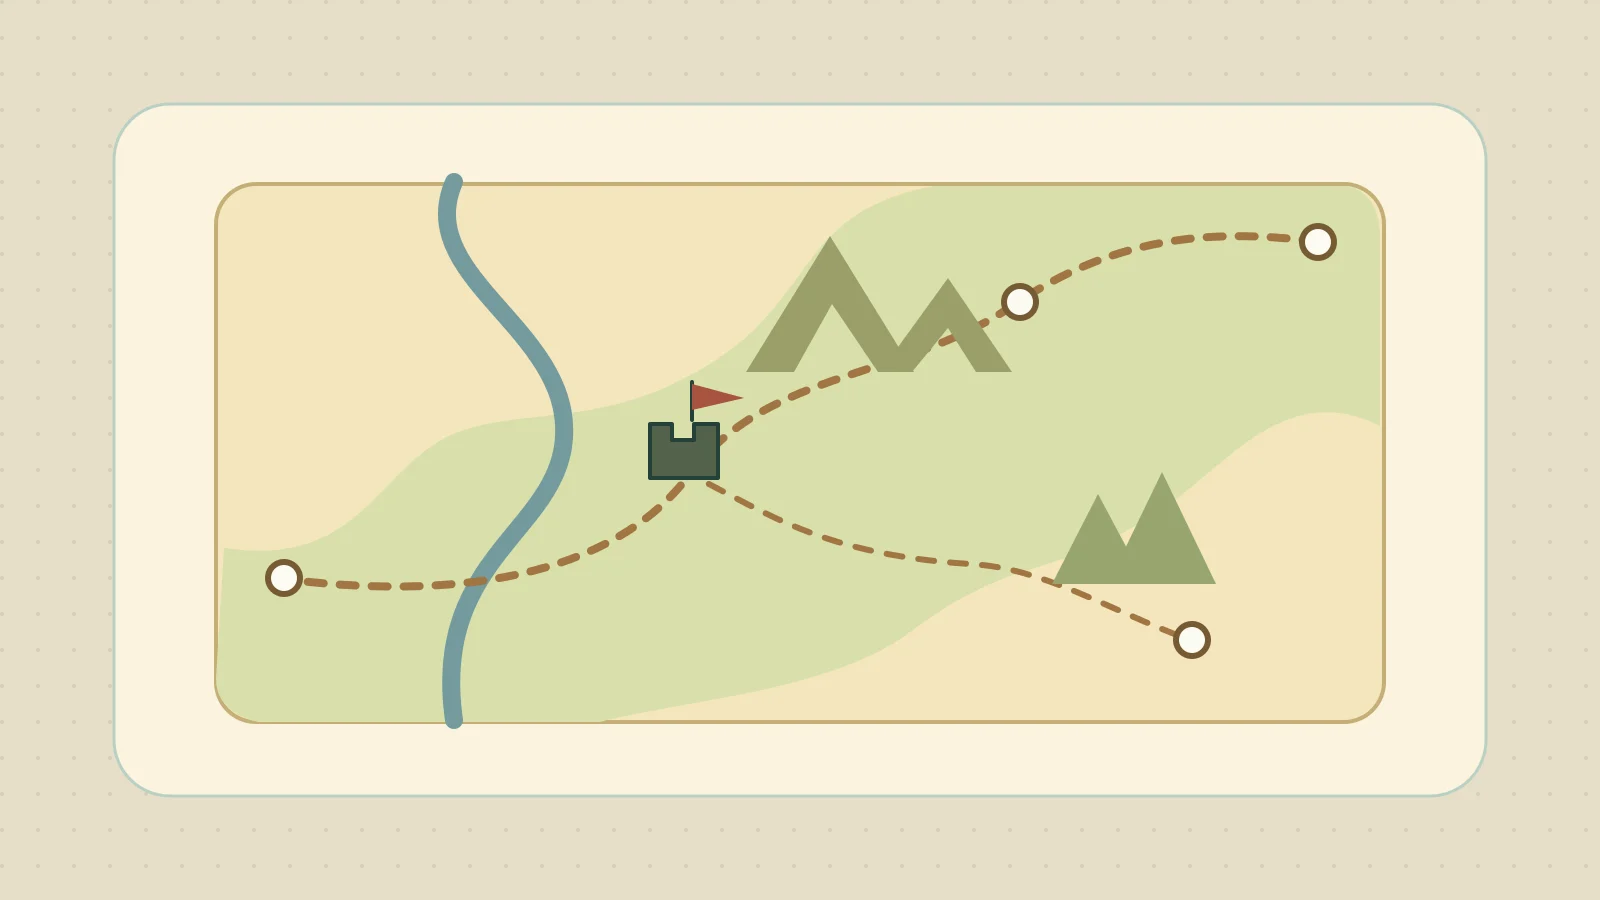
Early on, build up recruitment and food income, then pick dungeons according to the knights you want to recruit or the equipment you need. In the Light campaign, events follow in quick succession as you gain your tenth and eleventh cities. Prepare before taking the next one. This guide contains event spoilers and puzzle solutions. Names are romanized from the Japanese PC edition.
Editing RB2
Save data and memory editing
Editing save data
Turning back the in-game year gives you more time for domestic affairs. In the PC edition, two offsets from the start of the save file relate to the year, 0x3C and 0x3D. The Stirling 1.31 hex editor shows offsets and values in hexadecimal.
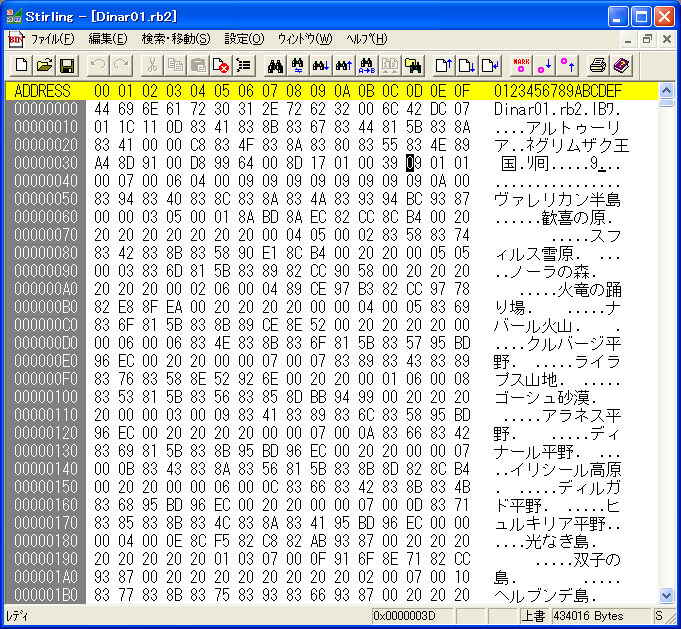
Stirling with 0x3D selected. 0x3C is immediately to its left.
- Keep the original save and make a copy for editing. Compare saves immediately before and after the year changes to check these offsets in your edition.
- Open the copy in Stirling and adjust the relevant values in small increments. A change of about
Ain hexadecimal (10 in decimal) at a time is a starting point. - Load the edited save in the game and check the displayed year and event progression.
The exact representation of the year and the effect of large changes on events are unverified.
Editing memory
Changing a value while the game runs requires identifying its address in the process’s memory. 0x3C and 0x3D above are offsets within the save file.
RB2 walkthrough
Events
The suspicious device
In the Light campaign, once you control 10 cities, Demon King Graiva installs a device in a city in Crimzag. Take that city within six months. If the deadline passes, plague spreads through your territory.
Roaming monsters appear
In the Light campaign, once you control 11 cities, around six to eight monster units appear near the capital where your ruler is stationed. Each unit has 100 soldiers. Make a city with few facilities your eleventh, then move the ruler there to meet the attack and spare your developed cities damage.
Event characters
Large units
| Name | Species / element | Location / conditions |
|---|---|---|
| Vilzark | Blue Dragon / water | Snow’s Tear. Recruits in Light, defeated in Dark. |
| Elbrad | Green Dragon / earth | Mount Trabanes. Recruits in Light, defeated in Dark. |
| Faifarn | White Dragon / wind | Palace of the Mad Dragon. Recruits in Light, defeated in Dark. |
| Earuza | Red Dragon / fire | Fire Dragon’s Palace. Recruits in Light, defeated in Dark. |
| Garteus | Griffin / wind | Rakios Jungle. |
| Keneros | Griffin / wind | Mount Kerenpom. |
| Hent | Cyclops / earth | Tsuval Cave. |
| Gora | Cyclops / fire | Giant’s Dwelling. |
Rulers and others in the Light campaign
| Name | Class / element | Rescue location |
|---|---|---|
| Trimdal | Gold Knight / light | Hertana Tower |
| Primdel | Sage / holy | Gurgan Cave |
| Vilsing | Water Mage / water | Igrimal Ruins |
| Zarkoil | Silver Knight / holy | Rone Tower |
| Nin | Wind Priestess / wind | Tanumi Ruins |
| Urol | Green Knight / earth | Barama Ruins |
| Motran | Warrior → Master Knight / neutral | Ralfa Dungeon |
| Friestia | Water Mage / water | Owl Dungeon |
Demon kings in the Dark campaign
| Name | Class / element | Location to defeat them |
|---|---|---|
| Demon King Sera | Sorcerer / dark | Sera Ruins |
| Demon King Alga | Dark Knight / dark | Alga Tower |
| Demon King Graiva | Dark Bishop / dark | Graiva Tower |
| Demon King Baldo | Dark Knight / dark | Baldo Ruins |
The four elven sages
Once you rescue Vilsing in the Light campaign, each of the following three has a 10% chance of entering your service in January each year.
| Name | Class / element |
|---|---|
| Spenhudal | Sage / holy |
| Grenmyuhal | Mist Bishop / water |
| Meashur | Water Priestess / water |
The remaining sage, Meramaitos, starts the Light campaign in captivity. He is subsequently brainwashed and serves Crimzag. Take him prisoner in battle to recruit him.
Other characters
| Name | Class / element | Recruitment |
|---|---|---|
| Courant | Warrior → Master Knight / neutral | Event about six months into the Light campaign. |
| Shariela | Priestess → Fire Priestess / fire | Joins with Earuza during the Fire Dragon’s Palace expedition. |
Class changes
At level 15, a knight in a starting class can advance to a class matching their element. Light and dark affinities change with faction. Griffins and dragons do not change classes.
| Element | Warrior | Thief | Mage | Cleric | Priestess |
|---|---|---|---|---|---|
| Neutral | Master Knight | Master Thief | — | — | — |
| Fire | Rouge Knight | — | Fire Mage | Flame Bishop | Fire Priestess |
| Water | Blue Knight | — | Water Mage | Mist Bishop | Water Priestess |
| Wind | White Knight | — | Wind Mage | Breeze Bishop | Wind Priestess |
| Earth | Green Knight | — | Earth Mage | Land Bishop | Earth Priestess |
| Light | Gold Knight | Ninja | Wizard | Arch Bishop | Light Priestess |
| Dark | Dark Knight | Assassin | Sorcerer | Dark Bishop | Dark Priestess |
| Holy | Silver Knight | — | Sage | — | — |
| Evil | Silver Knight | — | Dark Sage | — | — |
The cleric’s starting classes are Priest for Light and Dark Priest for Dark. The priestess starts as a Light or Dark Priestess. Male warriors can equip swords, axes, and bows. Female warriors can equip spears and bows.
Dungeon walkthrough
Check the campaign and the cities you control when deciding where to go. Some fixed chests can only be opened once. Others are repeatable, so look for those when collecting equipment.
Forgotten Land
- Campaign Light
- Objective Obtain the Proof of Courage
- Cities controlled Grims, Drentite
Baldo Ruins
- Campaign Dark
- Objective Recruit Demon King Baldo
- Cities controlled Grims, Drentite, Gerzant
Graiva Tower
- Campaign Dark
- Objective Recruit Demon King Graiva
- Cities controlled Grims, Drentite, Kuritado
Alga Tower
- Campaign Dark
- Objective Recruit Demon King Alga
- Cities controlled Grims, Drentite, Gerzant
Sera Ruins
- Campaign Dark
- Objective Recruit Demon King Sera
- Cities controlled Grims, Drentite, Gerzant
Rone Tower
- Campaign Light
- Objective Recruit Zarkoil, king of Dirgado
- Cities controlled Dirzam, Norbal, Metope
- Fixed chest (once) Magic Shield
- Fixed chest (repeatable) Mithril Bracelet
Tanumi Ruins
- Campaign Light
- Objective Recruit Nin, priestess of Metope
- Cities controlled Dirzam, Norbal, Metope
- Fixed chest (once) Circlet of Magic
- Fixed chest (repeatable) Helm of Healing (unverified)
Barama Ruins
- Campaign Light
- Objective Recruit Urol, king of Irugi
- Cities controlled Prezad, Dormis, Milworth
- Fixed chest (once) Magic Hammer
Take the left passage and get the key from the lower-left room. The Magic Hammer is at the fork one floor before that.
Ralfa Dungeon
- Campaign Light
- Objective Recruit Motran, council chair of Alvazar
- Cities controlled Myurezas, Rothschild, Alvazar
- Fixed chest (once) Magic Armor
You can proceed without taking the left or right side paths near the entrance.
Hertana Tower
- Campaign Light
- Objective Recruit Trimdal, king of Dinarl
- Cities controlled Dirmina, Rothschild, Alestaria
- Fixed chest (once) Magic Spear
Igrimal Ruins
- Campaign Light
- Objective Recruit Vilsing, elder of Nora
- Cities controlled Milworth, Dormis, Nora
- Fixed chest (once) Magic Breastplate
The clue reads NEW NEWS SEND WED. To get the key, follow NEW NEW(NS)S SEND WED and search the room entered at the N inside the parentheses. Look for a door of a different color.
Gurgan Cave
- Campaign Light
- Objective Recruit Primdel, high priest of Maizarion
- Cities controlled Maizarion, Hiram, Nora
- Fixed chest (once) Helm of Magic
Owl Dungeon
- Campaign Light
- Objective Recruit Friestia, queen of Siltian
- Cities controlled Colaneria, Kuritado, Hiram
- Fixed chest (once) Bracelet of Magic
Of the nine rooms you descend to from the last two floors, the fifth from the left holds the Bracelet of Magic and the eighth is the goal. The other seven are dead ends.
Tsuval Cave
- Campaign Both
- Objective Recruit Hent, a cyclops
- Cities controlled Prezad, Rothschild, Alvazar
- Fixed chest (once) Kiku-ichimonji
- Fixed chest (repeatable) Greatsword, Composite Bow
Tell Hent you came to talk, then ask him to join you.
Giant’s Dwelling
- Campaign Both
- Objective Recruit Gora, a cyclops
- Cities controlled Dirzam, Norbal, Metope
- Fixed chest (once) Greatbow
Answer “mouse” (ねずみ) to start combat with Gora confused. The suggested level is 6, but a party at that level is likely to struggle. If you fight, bring higher levels and good equipment.
Rakios Jungle
- Campaign Both
- Objective Recruit Garteus, a griffin
- Cities controlled Colaneria, Kuritado, Nora
- Fixed chest (once) Osafune
Give Garteus money. Collect the chest with 10 gold in the underground passage along the way.
Mount Kerenpom
- Campaign Both
- Objective Recruit Keneros, a griffin
- Cities controlled Prezad, Milworth, Dormis
- Fixed chest (once) Thief’s Bow
Palace of the Mad Dragon
- Campaign Both
- Objective Recruit Faifarn, the White Dragon (Light), or defeat him (Dark)
- Cities controlled Dirzam, Norbal
Recruiting Faifarn earns the Wind God’s Sword. Bring around 100 SP if you take the trapped route.
Snow’s Tear
- Campaign Both
- Objective Recruit Vilzark, the Blue Dragon (Light), or defeat him (Dark)
- Cities controlled Colaneria, Kuritado
- Fixed chest (once) Bracelet of Recovery
- Fixed chest (repeatable) Kotetsu
Say you came to see Vilzark, then answer “I can” (できる) to the next question.
Mount Trabanes
- Campaign Both
- Objective Recruit Elbrad, the Green Dragon (Light), or defeat him (Dark)
- Cities controlled Dormis, Drentite, Zeranilde
- Fixed chest (once) Shield of Strength
Fire Dragon’s Palace
- Campaign Both
- Objective Recruit Earuza, the Red Dragon (Light), or defeat her (Dark)
- Cities controlled Maizarion, Hiram, Nora
- Fixed chest (once) Staff of Protection
Puraji Cave
- Campaign Both
- Objective Obtain Fine’s Staff (Light only)
- Cities controlled Colaneria, Hiram
- Fixed chest (once) Dragon Breastplate
Crimson Falls
- Campaign Both
- Objective Obtain Fanes’s Sword
- Cities controlled Milworth, Ienia, Prezad
- Fixed chest (once) Dragon Shield
Search all the way to the far left before heading right. In the lower-left room with the key, check the slab touching the skeleton first, then the nearby slab, and finally the chest. Switch the character in charge of commands before leaving. It may be hard to explore every floor in one visit.
Norim Ruins
- Campaign Both
- Objective Obtain Nelfeed’s Bracelet
- Cities controlled Zeranilde, Dormis, Metope
- Fixed chest (once) Dragon Crown
At forks, take the route that uses a rope.
Harane Dungeon
- Campaign Both
- Objective Obtain Sol’s Helm
- Cities controlled Myurezas, Rothschild, Alvazar
- Fixed chest (once) Dragon Lance
- Fixed chest (repeatable) Mithril Breastplate, Mithril Armor, Mithril Helm, Kyotetsu
Collect both the cipher and combination tables, then use this arrangement.
(4)     (2)
×××     ×××
×××     ×××
△××     ×××

(1)     (3)
×××     ××○
×××     ×××
×××     ×××
Tartonia Tower
- Campaign Both
- Objective Obtain Raiart’s Armor
- Cities controlled Zeranilde, Dormis, Metope
- Fixed chest (once) Earth Axe
Shamamikan Ruins
- Campaign Both
- Objective Obtain Ryunan’s Spear
- Cities controlled Maizarion, Hiram
- Fixed chest (once) Dragon Helm
- Fixed chest (repeatable) Morning Star, Mithril Shield
The missing direction in “North, East, South, □, North” is West.
Rigyadi Ruins
- Campaign Both
- Objective Obtain Rises’s Breastplate
- Cities controlled Rothschild, Alestaria, Ilmeran
- Fixed chest (once) Dragon Bracelet
Zagrem Ruins
- Campaign Both
- Objective Obtain Miradia’s Shield
- Cities controlled Dirzam, Norbal, Myurezas
- Fixed chest (once) Dragon Armor
- Fixed chest (repeatable) Mithril Bracelet, Mithril Helm
Read the note in the library and then inspect the eastern room. Find the spot where the eight tiles surrounding the key satisfy both conditions involving two chests and two goddesses.
Large facility combinations
Standard combinations
Arrange four small facilities in a 2×2 square and learn the combination from a tavern rumor. You can then use the city command to combine them. Prioritize a Wholesale Market in cities where you want both money and food, and a Military Academy in cities where you want to train assigned knights. The A–C ratings are a rough building priority.
| Facility | Ingredients | Effects | Money / food | Recruitment | Rating and notes |
|---|---|---|---|---|---|
| High-Rise District | Town ×4 | Town ×6 | 18 / 0 | — | C |
| Market Complex | Market ×4 | Market ×6 | 120 / 0 | — | C |
| Warrior Training Hall | Barracks ×4 | Barracks ×6 | 12 / 0 | 300 warrior troops | C |
| Mage Academy | College ×4 | College ×6 | 12 / 0 | 300 mage troops | C |
| Grand Church | Church ×4 | Church ×6 | 24 / 0 | 300 cleric troops | C |
| Guild of Quick Hands | Guild ×4 | Guild ×6 | 36 / 0 | 300 thief troops | C |
| Large Farm | Field ×4 | Field ×6 | 0 / 3600 | — | C |
| Large Ranch | Ranch ×4 | Ranch ×6 | 16 / 3000 | — | C |
| Master Workshop | Workshop ×4 | Workshop ×6 | 36 / 0 | — | C |
| Undead Tomb | Grave ×4 | Grave ×6 | -30 / 0 | 300 skeletons, 180 zombies, 120 wights | A. Dark faction only |
| Warrior District | Town ×2 + Barracks ×2 | Town ×3 + Barracks ×3 | 24 / 0 | 150 warrior troops | B |
| Mage District | Town ×2 + College ×2 | Town ×3 + College ×3 | 24 / 0 | 150, troop type unverified | B |
| Cleric District | Town ×2 + Church ×2 | Town ×3 + Church ×3 | 30 / 0 | 150 cleric troops | B |
| Thief District | Town ×2 + Guild ×2 | Town ×3 + Guild ×3 | 36 / 0 | 150 thief troops | B |
| Commercial District | Town ×2 + Market ×2 | Town ×3 + Market ×3 | 78 / 0 | — | C |
| Craft District | Town ×2 + Workshop ×2 | Town ×3 + Workshop ×3 | 36 / 0 | — | C |
| Mixed Farm | Field ×2 + Ranch ×2 | Field ×3 + Ranch ×3 | 12 / 3300 | — | C |
| Arms Market | Workshop ×2 + Market ×2 | Workshop ×3 + Market ×3 | 78 / 0 | — | C |
| Wholesale Market | Field ×1 + Ranch ×1 + Market ×2 | Field ×2 + Ranch ×2 + Market ×4 | 88 / 2200 | — | A. Efficient use of land |
| Farming Barracks | Field ×1 + Ranch ×1 + Barracks ×2 | Field ×2 + Ranch ×2 + Barracks ×4 | 16 / 2200 | — | B. Efficient use of land |
| Monster Muster Hall | Goblin Town ×1 + Harpy Nest ×1 + Lizardman Swamp ×1 + Slime Hatchery ×1 | Goblin Town ×2 + Harpy Nest ×2 + Lizardman Swamp ×2 + Slime Hatchery ×2 | -12 / 0 | 200 goblins, 200 harpies, 200 lizardmen, 200 slimes | C. Efficient use of land |
| Military Academy | Barracks ×1 + College ×1 + Church ×1 + Guild ×1 | All knights gain experience passively. | 0 / 0 | — | A |
| Department Store | Field ×1 + Ranch ×1 + Workshop ×1 + Market ×1 | Money and food income ×1.5. | 0 / 0 | — | A. Stacks with Entertainment District |
| Pharmaceutics Lab | Field ×1 + Ranch ×1 + Vineyard ×1 + College ×1 | Adds Heal Potion S, M, L, and P, Antidote, Mind Potion, and Recovery Stone to city item crafting. | 0 / 0 | — | A in the capital, C elsewhere |
| Swordsmen’s District | Arena ×1 + Barracks ×1 + Guild ×1 + Town ×1 | Warriors and thieves gain experience passively. | 0 / 0 | — | C. Prefer the Military Academy for training all classes |
| Sage District | Library ×1 + College ×1 + Church ×1 + Town ×1 | Mages, clerics, and priestesses gain experience passively. | 0 / 0 | — | C. Prefer the Military Academy for training all classes |
| Entertainment District | Town ×1 + Market ×1 + Tavern ×1 + Vineyard ×1 | Tavern ×1. Money income ×1.5. | 0 / 0 | — | A. Stacks with Department Store |
Facilities created by combination accidents
Combining facilities can rarely produce something other than the intended result. Reload the pre-combination save if the result is unsuitable, such as a Monster Gate in the Light campaign.
| Facility | Effect |
|---|---|
| Earth Tower | Doubles food harvests. |
| Magic Tower | Multiplies magic power growth by 1.5. |
| Golden Tree | Doubles money income. |
| Tower of Heroes | Doubles recruitment of warrior, mage, cleric, and thief troops. |
| Stone Circle | Cancels disasters. |
| Monster Gate | Doubles recruitment of monster and undead troops. |
Monster Gate covers goblins, harpies, lizardmen, slimes, skeletons, zombies, and wights. Even a high-producing city can show zero food despite a positive balance if it maintains too many non-undead troops. Use about 10,000 per troop type as a rough upper limit and check food stocks after recruiting.
Administration from the opening to securing conquered territory
Review appointments first. The regent takes priority because that role affects both money and food income.
| Role | Key stat | Affected value |
|---|---|---|
| Regent | Intelligence | Money and food income |
| Knight Commander | Attack | Recruitment |
| High Priest | Magic power | Magic power |
- In cities without a tavern, build one with the future Entertainment District in mind. Assign construction to a knight with a high combined Intelligence and Attack score.
- In the opening, check available recruits in every city you control each turn.
- Lay out one Barracks, College, Church, and Guild in a 2×2 square for a future Military Academy. In cities with little income, do step 6 first.
- Place two Towns next to each other and first make each troop type available for recruitment.
- Spend any capacity left over on building additions.
- Set up several blocks with two Markets, one Ranch, and one Field. Convert them to Wholesale Markets as that becomes possible to secure income.
- In parallel, lay out blocks for a Warrior District, Mage District, Cleric District, and Guild of Quick Hands. The Towns from step 4 can be used in one of the two-Town layouts.
- Once each human troop type has around 4,000–5,000 troops, pause recruitment and check food reserves. Food may show as zero after mass recruiting.
- Convert eligible blocks to Military Academies.
- In cities making weapons and armor, build 12 Workshops to reach weapon level 3. More Workshops do not increase it, so use the remaining land for other facilities.
- Put a Pharmaceutics Lab in a city responsible for crafting items, such as the capital.
If a city is short on money or food, set up its Wholesale Market blocks first. Delegate administration once a city’s finances and supplies are stable. In the Dark faction, undead recruits from Graves and Undead Tombs consume no food, so cities can build units even when food is scarce.
As your territory grows, consider Milworth as a capital candidate. Computer control can leave units idle, so if you use Milworth, consider keeping it as a base you command personally.